Showing posts with label sewing patterns. Show all posts
Enhance Your Sewing Patterns with Bust Darts: A Step-by-Step Guide

2/23/2024

Enhance Your Sewing Patterns with Bust Darts: A Step-by-Step Guide


 Are you looking to give your garments a custom-fit look? Bust darts are a fantastic way to add shape and structure, ensuring your clothes hug your figure just right. If you’ve ever felt baffled by bust darts, worry no more! I’ve created a detailed video tutorial that will guide you through the process, step by step.


Why Add Bust Darts?

Bust darts are essential for anyone wanting to tailor their clothing to their body. They help to eliminate bagginess and provide a smooth, fitted silhouette that enhances your natural shape. Whether you’re working on a dress, blouse, or any top, adding bust darts can make all the difference.


Materials & Tools Needed:
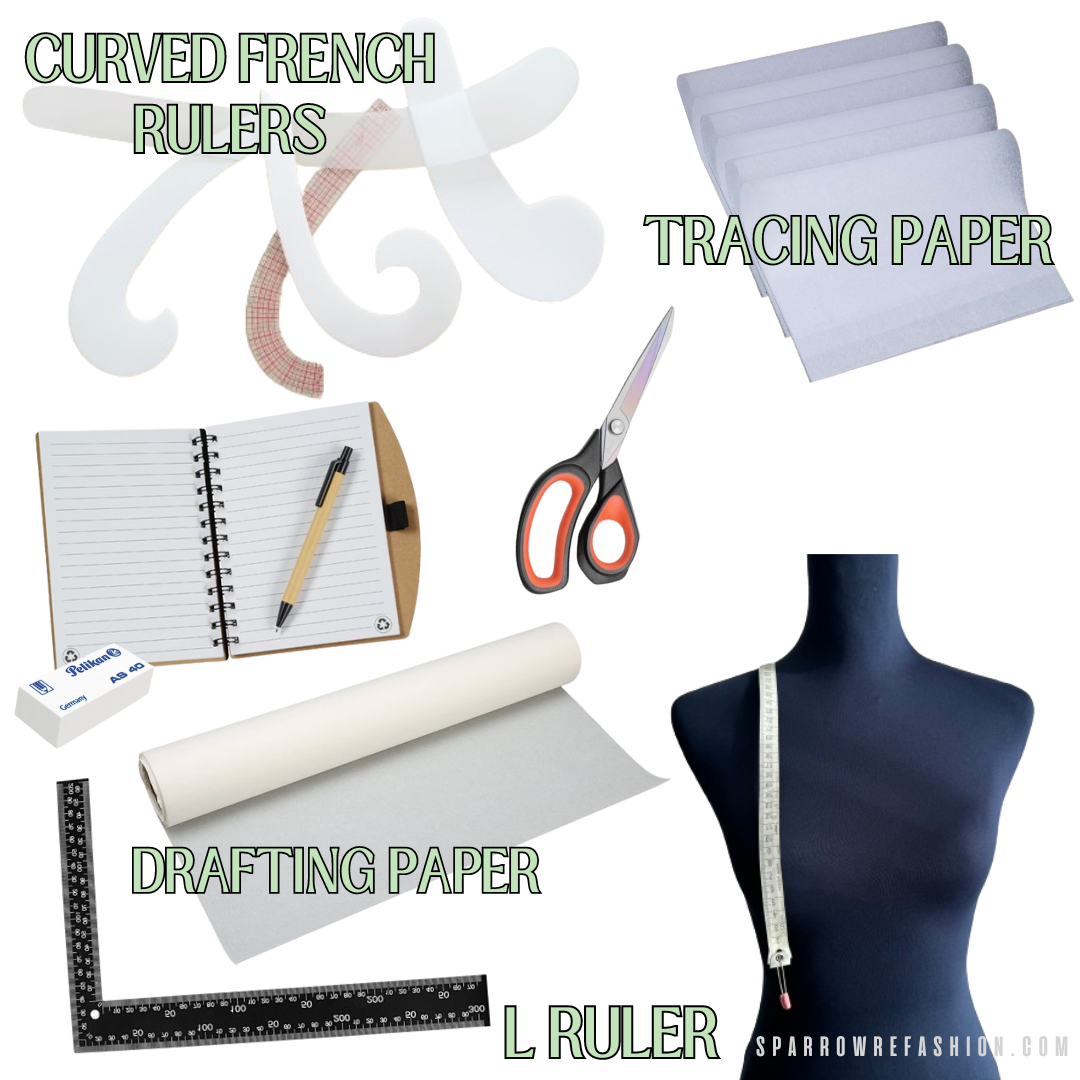
Pattern drafting tools.

The Video Tutorial: 

 To make learning as easy as possible, I’ve put together a video tutorial that covers everything you need to know about adding bust darts to your sewing patterns. From marking and measuring to the final stitches, I’ll walk you through each stage with clear, easy-to-follow instructions.

Watch Detailed Video Tutorial Here 


How to Sew Bust Darts

Explore my detailed tutorial and step-by-step instructions for creating bust darts. This guide is carefully crafted to help newcomers navigate every step, filled with useful sewing tips to improve your sewing skills.

Read the post here.

Watch the video here.

Step-by-Step Guide:

  1. Choosing the Right Pattern: Start with a pattern that fits well everywhere else. The bust area is where we’ll focus our adjustments.
  2. Marking the Dart Points: Learn how to locate the correct position for your darts based on your body measurements.
  3. Sewing the Darts: I’ll show you the technique for sewing smooth, even darts that lay flat against the body.
  4. Pressing for Perfection: Discover the secrets to pressing your darts without leaving marks


Ready Bust Darts !

Adding bust darts doesn’t have to be complicated. With my step-by-step video tutorial, you’ll master this technique in no time, and your sewing projects will look more professional than ever. So, head over to the video, give it a watch, and don’t forget to like and subscribe for more sewing tips and tricks!


 This post has affiliate links * Affiliate Link. This means that if you click on the link and purchase an item, I will receive a small percentage of your purchase (at no extra cost to you).


 How to Sew More Accurately [Sewing Tips and Tricks]

2/02/2024

How to Sew More Accurately [Sewing Tips and Tricks]


Sewing is a wonderful hobby that can be both relaxing and rewarding. However, it can be frustrating when your sewing projects don’t turn out as well as you’d hoped. Fortunately, there are many tips and tricks you can use to sew more accurately and make your projects look more professional.


Sewing is a craft that has been around for centuries. It is a skill that can be learned by anyone, and with practice, you can create beautiful garments and accessories. In this blog post, we will discuss some tips and tricks that will help you sew more accurately and make your projects look more professional.


''Must have'' Sewing Tools

Having the right tools is essential for sewing. Here are some tools that you should have in your sewing kit:

  • Scissors: A good pair of scissors is essential for cutting fabric. Make sure to keep them sharp and use them only for fabric.

Check out my detailed post on scissors and learn what scissors use to what project.
 

  • Seam ripper: A seam ripper is a small tool that is used to remove stitches. It is helpful when you need to redo a seam.

Check out my detailed post on this amazing tool.


  • Measuring tape: A measuring tape is used to take measurements. Make sure to get a flexible measuring tape that can wrap around curves.

Learn how to measure yourself for sewing and drafting patterns.
 

  • Rotary cutter: A rotary cutter is a tool that is used to cut fabric. It is faster and more accurate than scissors.


  • Sewing machine: A sewing machine is not essential, but it can make your sewing projects faster and more efficient. Make sure to get a machine that has features like automatic needle threading and a speed control slider to make your sewing experience smoother.

Learn more on sewing machines and choose the best for yourself.

Sewing Tips and Tricks for More Precision

Here are some tips and tricks that will help you sew more accurately:

  • Take your time: Sewing requires patience and attention to detail. Take your time when cutting your fabric and sewing your seams to ensure accuracy. Rushing through your project can lead to mistakes and frustration.
  • Press your seams: Pressing your seams is an important step in sewing that can make a big difference in the final result. Use an iron to press your seams flat and open to create a professional-looking finish.


  • Use a seam guide: A seam guide is a tool that helps you sew straight seams. You can use a stack of post-it notes or a magnetic seam guide to keep your seams straight and accurate.


  • Practice, practice, practice: The more you sew, the better you’ll get. Don’t be afraid to try new techniques and experiment with different fabrics. With practice, you’ll become more confident in your sewing skills and be able to tackle more complex projects.


Helpful Tools

Here are some helpful tools that you can use to make your sewing projects easier:

  • Fabric glue: Fabric glue is a great alternative to sewing. It can be used to hem pants, fix seams, and attach patches.


  • Sewing clips: Sewing clips are a great alternative to pins. They are easier to use and won’t damage your fabric.


  • Marking tools: Marking tools are used to mark your fabric. You can use chalk, a water-soluble pen, or a disappearing ink pen to mark your fabric.


Sewing is an awesome and rewarding hobby that can be enjoyed by anyone. With the right tools, tips, and tricks, you can sew more accurately and make your projects look more professional. Remember to take your time, practice, and have fun!

 This post has affiliate links * Affiliate Link. This means that if you click on the link and purchase an item, I will receive a small percentage of your purchase (at no extra cost to you).

How to Sew and Style 4 Last-Minute Dresses for Valentine’s Day

1/19/2024

How to Sew and Style 4 Last-Minute Dresses for Valentine’s Day


 Valentine’s Day is just around the corner and you don’t have anything to wear. Don’t panic, you can still make your own stunning dresses with some simple sewing skills and creativity. In this post, I’ll show you how to sew and style 4 different dresses that are perfect for any occasion. Whether you want to impress your date, have fun with your friends, or treat yourself, these dresses will make you feel fabulous and confident. Ready to get started? Let’s go !

The Best Fabrics for Valentine’s dresses

 If you're looking for a dress that exudes romance and sophistication, you can't make a wrong choice with materials like satin, velvet, lace, or crepe. These fabrics offer a smooth and soft texture against your skin, and their shiny or matte finish reflects light in various captivating ways. Additionally, they drape beautifully, creating a flattering and elegant silhouette for your body. Perfect for Valentine's Day, these fabrics are often linked with luxury and refinement, and they can make you feel glamorous and self-assured. Whether you prefer a formal, flowing, or fitted dress, these fabrics will undoubtedly enhance your stunning appearance.

 The Best Colors for Valentine’s Dresses Fabrics

 Here are some recommendations for the optimal colors to consider when selecting fabrics for Valentine's dresses:


1. Red is the timeless color of Valentine's Day, symbolizing passion, love, excitement, and courage. Fabrics such as satin, velvet, lace, or crepe offer a smooth and lustrous texture, along with an exquisite drape. They are frequently utilized for formal, flowing, or fitted dresses that exude romance and elegance. 2. Pink is another popular choice for Valentine's Day, embodying sweetness, innocence, happiness, friendship, and gentle romantic love. Natural and breathable fabrics like cotton, linen, rayon, or cotton knit are often preferred. These fabrics are commonly used for casual, comfortable, or t-shirt dresses that convey affection without the intensity of red. 3. White is a color that symbolizes purity, perfection, spirituality, and new beginnings. Light, airy, and delicate fabrics such as silk, lace, or chiffon are frequently chosen. They are often utilized for bridal or princess-like dresses, evoking themes of falling in love again or preparing for a new stage in a relationship. 4. Purple signifies mystery, spirituality, creativity, and royalty. Rich, warm, and soft fabrics like velvet, tweed, or heavyweight knit are often favored. These fabrics are commonly used for cozy, winter, or structured dresses that reflect the profound and spiritual aspects of love relationships. 

Sewing tutorials for 4 Last-Minute Dresses for Valentine’s Day with Free PDF Patterns

Now  I will show you a selection of my finest Valentine's Day dresses that you can create on your own. Each dress is accompanied by video tutorials and complimentary PDF patterns or straightforward pattern drafting instructions, allowing you to easily follow along and enjoy the process of sewing. Moreover, you have the freedom to personalize these dresses according to your preferences, whether you desire a more romantic or seductive look. You can modify the sleeves, neckline, length, and more to create a dress that perfectly suits your style.

Sexy backless dress

Flirty corset back dress

Romantic pink dress

Seductive corset dress

 How to Accessorize and Layer your Valentine’s Dress ?

 1. To enhance and add depth to your Valentine's dresses, carefully select accessories that complement the style, color, and occasion of your outfit. If you opt for a ravishing red lace dress, consider pairing it with elegant gold jewelry, sleek black heels, and a sophisticated clutch to achieve a formal and refined look.


 Conversely, if you choose a charming pink cotton dress, accessorize it with delicate silver jewelry, elegant white pumps, and a trendy crossbody bag .


 2. Elevate your dress ensemble by layering it with a stylish coat, jacket, or cardigan that harmonizes with your dress while providing warmth. For instance, if you decide on a graceful white silk dress, layer it with a sophisticated beige trench coat or a cozy cream cardigan to achieve a chic and fashionable look.


 Alternatively, if you opt for a luxurious purple velvet dress, consider layering it with a sleek black leather jacket or a cozy gray knit sweater for a snug and stylish appearance.


 I hope you enjoyed this post and learned how to sew and style 4 last-minute dresses for Valentine’s Day. These dresses are easy to make, affordable, and versatile. You can mix and match them with different accessories, shoes, and jackets to create different looks. Which dress is your favorite? How are you going to celebrate Valentine’s Day? Let me know in the comments below. And don’t forget to share this post with your friends who might need some inspiration. Happy Valentine’s Day!


 This post has affiliate links * Affiliate Link. This means that if you click on the link and purchase an item, I will receive a small percentage of your purchase (at no extra cost to you).


DIY Coat Pattern: Learn to Create Your Own Patterns with This Easy Tutorial

12/03/2023

DIY Coat Pattern: Learn to Create Your Own Patterns with This Easy Tutorial


how to self draft basic coat pattern

Hello ,  I have an exciting video for you that will teach you how to self drafting pattern for basic coat. In this video, you will learn how to measure yourself, how to draft your pattern, and how to sew your coat. You will also learn how to make four different types of collars for your coat: basic, simple, round, and strength. And as a bonus, I will also give you for free 6 french curved rulers for pattern making. This video is perfect for beginners who want to create their own custom coat.

 learn how to self draft basic coat pattern

Self drafting pattern is a skill that allows you to create your own custom patterns for sewing garments. It can be very rewarding and fun, but it also requires some basic tools and knowledge. One of the most important steps in self drafting pattern is measuring yourself correctly. Measuring yourself is important because it will help you to draft patterns that fit your body shape and size. If you measure yourself incorrectly, your patterns will not fit well, and your garments will look unflattering and uncomfortable. Measuring yourself is also important because it will help you to adjust existing patterns to your measurements, or to compare your measurements with standard size charts.

In this video, I will show you how to measure yourself for self drafting pattern, and what measurements you need to take. You will need a measuring tape, a pencil and a paper, a mirror, and a friend or a helper. You will need to take the following measurements for self drafting pattern, :

  • The waist: Measure around your natural waistline, where your belly button is.
  • The shoulders: Measure across your back from one shoulder tip to the other.
  • The bust: Measure around the fullest part of your chest, under your arms.
  • The neck: Measure around your neck, where your collar would sit.
  • The armhole: Measure around your arm, from the shoulder tip to the armpit.
  • The sleeve length: Measure from the shoulder tip to the wrist, with your arm slightly bent.
  • The wrist: Measure around your wrist, where your cuff would sit.
  • The hips: Measure around the widest part of your hips, below your waist.

You can see in the pictures below how to measure yourself correctly. Make sure the measuring tape is not too tight or too loose.


Once you have your measurements, you can start drafting your pattern. You will need a large piece of paper, big enough to fit your coat. You can use newspaper, wrapping paper, or any other paper you have. You will also need a french curve ruler and an L square ruler. A french curve ruler is a curved ruler that is very useful for pattern making. You can use it to draw smooth curves for necklines, armholes, and sleeve caps. An L square ruler is a ruler that has a right angle at one end. You can use it to square your work, measure 90 degree angles, and draw straight lines. It is ideal for pattern drafting, cutting, and measuring.

In this video, I will show you how to draft your pattern for a basic coat, and how to make four different types of collars for your coat: basic, simple, round, and strength. Each collar has a different shape and style. You can choose the one that suits your preference and personality. You can see in the pictures below how to draft your pattern and how to make the collars.


After you have drafted your pattern, you can cut your fabric according to your pattern pieces. Make sure you add 1 cm seam allowance to all edges.

And that’s it! You have just made your own coat with self drafting pattern. I hope you are proud of your achievement and enjoy wearing your coat.

Step by step video on how to self sraft basic coat pattern.

But wait, there’s more! As a bonus, I will also give you for free 6 french curved rulers for pattern making. These are pdf patterns that you can print and cut out, and glue them on cardboard. Then you can use them to draft your pattern. These are 6 different types of french curved rulers, that will help you draw different curves for different garments. 

free french curved rulers for drafting and pattern making


To get the free french curved rulers, you just need to click the link in the description below. You can download the pdf patterns and print them out. Then you can cut them out and glue them on cardboard. Then you can use them to draft your pattern.

Click and get your free french curved rulers .

I hope you enjoyed this video and learned something new. If you have any questions or feedback, please leave a comment below. I would love to hear from you. If you liked this video, please give it a thumbs up and share it with your friends. And don’t forget to subscribe to my channel and hit the bell icon to get notified of my new videos. I will see you in the next video. Happy sewing!


Pins: